Neon sign repair
This page was created to
help you, the do it yourselfer
fix, repair and / or replace parts on your neon beer or other neon signs.
With basic skills and tools you can diagnose and repair your neon sign.
Some things can be fixed, other things like broken or burned out neon
tubes
or weak or burned up transformers must be replaced.
Links to specific brands of replacement tubes are to the left.
Click on pictures to enlarge.
First some warnings!
1. Neon
sign transformers typically have an output of 4,000 - 12,000 volts.
Yes that's enough to kill you, at the very least it will knock you down.
Worse yet you
might jump and break another tube on your sign, and you know how painful that is.
With a little
care you will live through this.
2. Neon
tubes are very fragile, you should treat them like you are diffusing a bomb!
One slip and boom, its broke. Ok,
it won't kill you, but the thought of breaking another tube might.
3. Unless
I say PLUG IT IN, leave it un-plugged.
Shortcuts to particular areas
Is it a tube or the transformer ?
Replacing neon tubes
Is it a tube or a transformer?
Carefully
(lightly) wiggle the tubes every couple of inches to check for breaks.
If broken, replace it.
None available? Check with a sign company to see about repair.
Usually the cheapest repair will be more than a replacement, and may not look as
good.
No breaks?
You can do
a basic check of the transformer by disconnecting the transformer lead wires from the tubes.
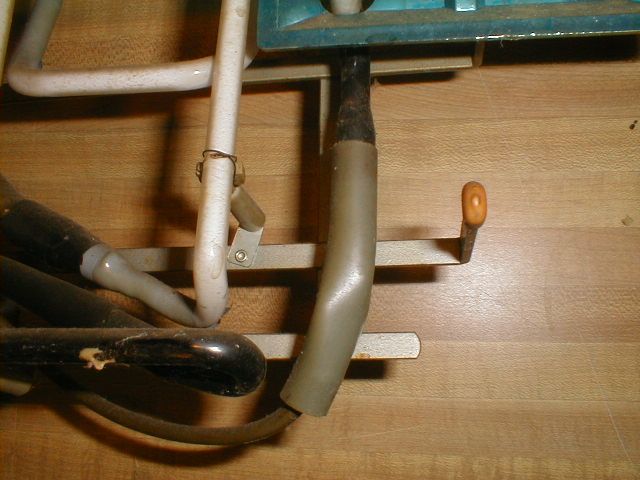 Find the spot where the transformer lead connects.
IF
the insulation boot is loose slide it away from the glass tube, twisting helps
(be careful don't twist the glass tube).
Assuming it isn't loose, you should cut it.
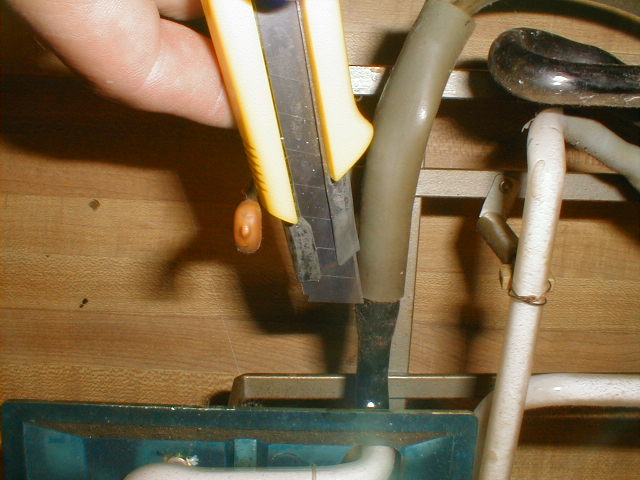 Using a very sharp
knife, cut the insulation tube. You MUST NOT push on the glass neon tube unless you
support it with your other hand (the
hand you are about to cut if you slip).
Using a very sharp
knife, cut the insulation tube. You MUST NOT push on the glass neon tube unless you
support it with your other hand (the
hand you are about to cut if you slip).
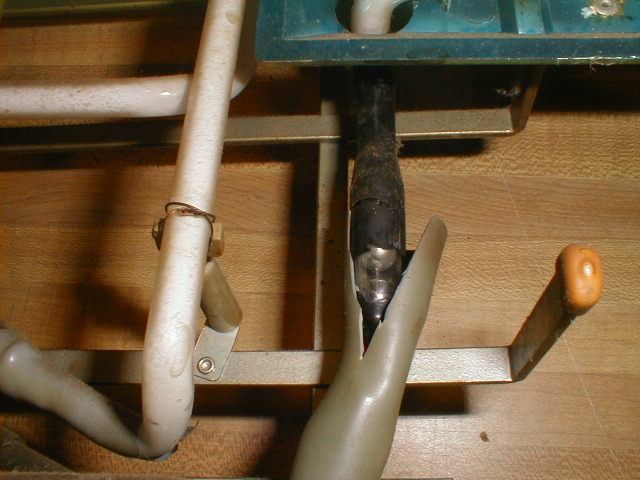 Now you can
pull the insulation tube away from the glass tube.
Now you can
pull the insulation tube away from the glass tube.
You may need to lightly twist or cut it in several places.
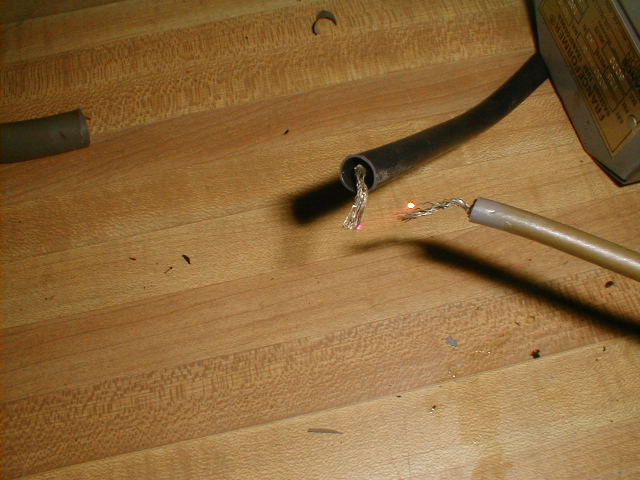
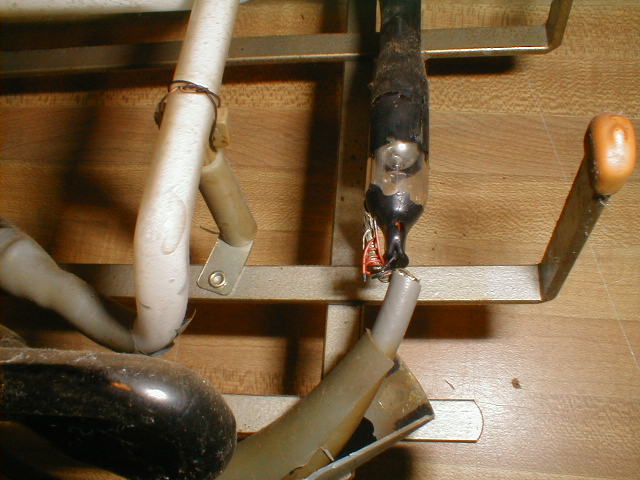 You should see something
like this, usually the wires are wound
You should see something
like this, usually the wires are wound
well. Be careful, the neon tube electrode wires are tiny and you don't want to break
them off, don't twist them too much!
After
disconnecting both leads you can do a basic, non-scientific check of your neon transformer.
(This will probably only work with the older heavy style transformers, the
newer electronic ones will probably fail this test even if good.
Test the newer ones by trying another trans on your sign or hook your electronic
trans to a known good tube.)
Try to arrange the leads so that the bare ends are about 1/2 inch
apart.
Use wood blocks or wire ties to accomplish this. Also have a well insulated
screwdriver or a stick handy. With the stick / screwdriver in one hand, plug in
the transformer with the other.
Is the switch on? If not turn it on.
If you get no arcing try pushing one lead closer with the stick.
Still nothing? Try pulling the switch on. If you get an arc take the stick and
widen the gap between the wires. Typically you can go about 1/2 to 3/4 of an inch
before it quits arcing.
 Not the best picture of an
arc, but this is it.
Not the best picture of an
arc, but this is it.
If you get
a tiny spark that barely will arc you have a bad transformer (sorry).
If you get nothing at all you may have a bad trans or better, a bad switch or
cord.
UN PLUG it now!
If you
suspect a bad switch, after un plugging, remove the small cover around
the switch, unwire the 2 switch wires and wire the 2 wires that they connected
to together.
Be sure to put a wire nut back on this connection.
Plug it in.
Now try the arc test again.
If you get a good arc, your switch was bad.
No arc, bad trans or bad cord.
You can check the cord for continuity with a test light. Be careful.
Transformers
can be purchased from sign companies but can be pricey, friendly beer
distributors can help get you one or point you in the right direction.
Ebay is a good source for both new and used transformers, search under neon
transformer, sign transformer, neon power supply or tesla
coil. You can also search out the brand names such as Franceformer.
Just be sure you are buying a working transformer, watch for terms like "I
don't know anything about this" or "as is".
As long as the input voltage (120v or 240v) and the output voltage (4,000v or
5,000v) and the output amperage (20ma or 30ma) is the same as your transformer,
it will work. If it's a different size or style you may have to drill holes or
whatever, but it will power the sign correctly. All this assumes the trans on
your sign was the right one in the first place.
Replacing tubes
Again, UN PLUG IT!
You will have to find the places where the neon tube connects to the lead wires or other
tubes. Check to see if it is loose and can be twisted and pulled back. If not,
try a heat gun and if that doesn't do it cut the insulation boot or sleeve with a very sharp
knife/razor. Be careful not to
break the neon tube with pressure, support it with your other hand (boy
is that knife sharp, wink-wink).
Pull the insulation tube back to expose the electrode wires.
You will see something like this. The
wires should be twisted together, be careful not to break these tiny wires. Just
un-twist them in the proper direction.
Do this to both ends of the tube(s). DO NOT let them bend at the glass,
hold them steady with one finger & thumb to support the wires at the
glass and un-twist the rest, do the same when re-installing.
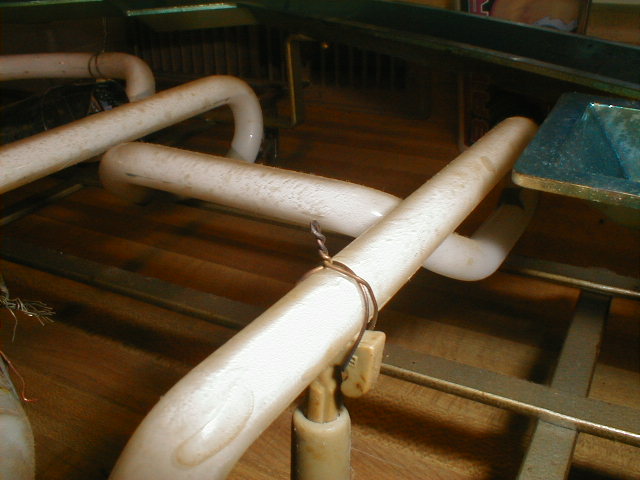 Most neon signs will have the tubes held on
with small wires like this.
Most neon signs will have the tubes held on
with small wires like this.
Just un-twist them or snip them off. Some newer signs have plastic ties, you will have to cut
and discard those then use wire to re-assemble.
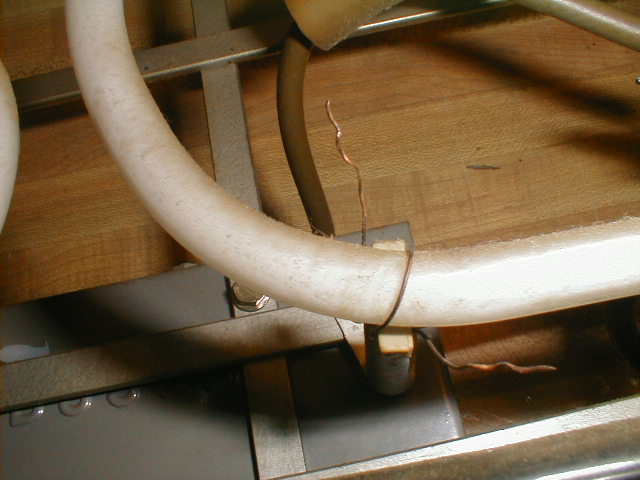 Once un-twisted, you will have to remove
them.
Once un-twisted, you will have to remove
them.
Notice how these are done, you will want to re-install them later.
Take all these ties off,
then you can remove the neon tube. Note newer signs may have plastic tube mounts
that snap onto the tubes.
Do pay attention to the order that the neon tubes must come off, you will need
to
follow this order when re-assembling.
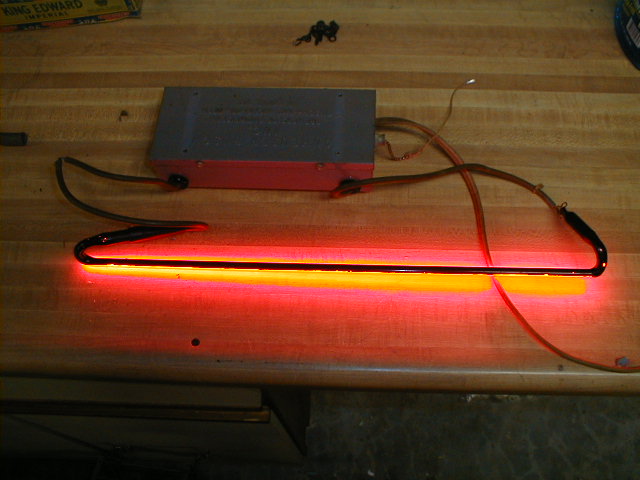
All you need to test a
tube is a good transformer.
Just put the leads on the tube electrode wires, plug it in, turn on the switch.
If it lights it's good. If it's weak it needs gas, usually this means trash it
or
get another, some neon shops can break and re-gas some tubes.
If you want to make your neon sign real nice you will want to clean it.
You
can dust it if it's not bad, but if it has 10 years worth of nicotine
and grill grease on it, then the only real way is to disassemble it and wash
the tubes and frame. Using the basic rules for neon tube removal, take them off.
Once off you can wash them in the sink, a good detergent works best, soaking is
good.
I like using a soft pot scrubber, gently rub the tubes till the gook comes off,
and rinse.
IF the tubes are coated on the outside I wouldn't recommend trying this
as most coated tubes will already be nicked and flaking and scrubbing would
possibly remove the coating. You can remove the transformer from the frame and do the same to the frame, you
can even pressure wash the frame at the car wash if you like.
If you don't want
to try taking it apart you can try spraying the sign with a detergent / cleaner
and spray it off with water. Keep in mind you should blow off all excess water
and let it air dry for several days (setting it in the sun would help).
Painting
your neon sign
You may want to paint the frame after washing it (if it's bad enough).
If the black out paint on the tube(s) has came off, it is easy to touch
up.
There is a professional black out paint for this, but a good oil based enamel
works fine.
I like Rust-Oleum, brush only, spray just doesn't cover.
The best way to be sure and get the back areas blacked out is to power
the tube up and paint it while lighted, this way you can see the thin spots that
you might miss when
not lighted. Note that the paint flows well when hot, cures best when cooled
down.
If you have coated neon tubes that are flaking or scratched there is no paint to
fix them, sorry
Basically
just reverse the take apart.
If all your tubes have been removed, I suggest doing a trial run re-installing
them before tying them down, this way you can be sure you are doing it in the right order.
Don't forget to put the insulation tubes on the tubes, before assembling,
you may not be able to after installing them.
I suggest lightly tying all the tubes on until all tubes are on the frame (to be sure all are in the right order and fit), then twisting the ties down until snug (twist too hard and oops). Snip off the extra tie wire.
If
you cut your insulation boots when dis-assembling you can tape over them,
or you can buy some here.
If you can't reuse your copper neon tube tie down wires I have tie wire on the supply page.
I have high voltage wire to connect tubes to transformers on the supply page.
If
you have a bad lead from a transformer, or one is too short, you can splice on
to it
using the above mentioned wire. Using one or two layers of shrink tube over the splice is
a good idea.
I hope this has
helped you to figure out your neon sign problems and/or repair them.
I have tried to explain things the best I can, let me know if you have any
suggestions or helpful hints
Need parts? I
may have them here.